Monday, December 14, 2015

How to delete cache files in Mac OS X?

To clear your user cache, browser cache, and system cache, there are two folders to consider. Do the following:
  1. Open a Finder window and select “Go to Folder” in the Go menu.
  2. Type in ~/Library/Caches and hit enter to proceed to this folder.
  3. Go to Edit/Select All or by hitting Command A to select all data within the folder.
  4. Click on Action wheel, and select Move to Trash.
  5. Then go to Macintosh HD. Open Library folder and then open Caches folder.
  6. Go to Edit/Select All or by hitting Command A to select all data within the folder.
  7. Click on Action wheel, and select Move to Trash.
  8. Restart your Mac and empty Trash.

Wednesday, September 30, 2015

Apple ID is grayed out. How do you fix it?

How do you remove a grayed out Apple ID? It is as simple as following these quick few steps.

1. The application that is listed for an update in the App store, go locate it in your Applications folder (usually in the /Applications folder).
2. Right click the application, then select “Show Package Contents”.
3. Open the “Contents” folder, then open the “_MASReceipt” folder.
4. Delete the “receipt” file. You may need to enter a local administrator username and password.
Please note that the application will still work as intended. Your Apple ID should be blank and you should be able to enter the one you need.

If that does not work, then delete the application from your Applications folder and reinstall it using the correct currently active Apple ID and password.

Thursday, August 20, 2015

How to export your LinkedIn contacts into Microsoft Excel?

You can export all your LinkedIn contacts to a .csv file and import this file into Excel.

Follow these steps:

1. Log in to your LinkedIn homepage and click on the tab 'Connections'.

2. Click on the 'Settings symbol'. Looks like a wheel.


3. Click 'Export LinkedIn Connections' under Advanced Settings in the right column on the page.

4. Choose 'Microsoft Outlook (.CSV file) and click 'Export'.

5. Type the Security Verification and click 'Continue'.

6. Your LinkedIn Connections were successfully exported to a .csv file and saved in the Downloads folder on your computer.

7. Start up Excel and then open the file within Excel by selecting File/Open.

8. Once the file opens, remove all the empty columns,

9. Save the file by selecting File/Save. Select Excel Workbook format, click on 'Save' and your file is ready.

Note that you can't save all of the LinkedIn data, but you will have First Name, Last Name, Email Address, Company and Job Title.

Thursday, June 18, 2015

NPAPI plugins don't work on Chrome version 42 and higher

Plugins allow extra features to be added to browsers. For example, you can watch certain videos, view certain documents or play a game that is on a Web page.

NPAPI support has ended
In the past, many plugins were developed using an older system called NPAPI. Today fewer sites are using NPAPI plugins and they can sometimes cause security risks on Web sites.

To make browsing with Chrome safer, faster and more stable, support for NPAPI plugins has been ended with Chrome version 42.

Plugins supported
Plugins that use a newer, more secure system called Pepper API (PPAPI) will continue to work, including those that ship with Chrome, like Adobe Flash and PDF Viewer. However, plugins that use NPAPI, including Silverlight, Java and Unity won't work.

How to temporarily enable NPAPI plugins
If you must use a NPAPI plugin, there is a temporary workaround that will work until Chrome version 45 is released later in 2015:

1. Open Chrome.

2. In the address bar at the top of the screen, type chrome://flags/#enable-npapi

3. In the window that opens, click the link that says Enable under the Enable NPAPI flag:


4. In the bottom left corner of the page, click the Relaunch Now button.

After the release of Chrome version 45, you will need to use an alternate Web browser to load content that requires a NPAPI plugin.

Wednesday, January 7, 2015

The top margin in Microsoft Word is missing

When you open a Word document, the insertion point is at the top left corner of the page, as if there were no top margin.

Cause
If you're reading the document in Print Layout view and all of the pages appear to be cut off, with no top or bottom margin, the option for hiding white space between pages has been turned on.

Resolution 1
If the top and bottom margins are not showing, you can restore them by pointing and clicking in the document, or by using the View tab.

1. When top and bottom margins are not showing, point to the top or bottom of a page until the pointer becomes a double-pointed arrow as shown in the picture above, and then double click.

2. When white space between pages is showing, the entire top and bottom margins are visible.

Resolution 2
To use the View tab to show white space between pages, do the following:

1. On the View tab, click Print Layout.

2. Click on the File tab, and then click Options. Word Options window opens.

3. Click Display.

4. Under Page display options, select the 'Show white space between pages in Print Layout view' check box.

Wednesday, November 12, 2014

Outlook for Mac 2011: How to display separate inboxes for each email account?

By default, Outlook’s folder list groups together the inboxes and other similar folders from all email accounts together. If you want your inboxes kept separate for each account, you can disable this feature.
1. Open Outlook.
2. Go to the Menu and click Preferences.

3. Under Personal Settings, select General.
4. Under Folder list, uncheck the Group similar folders, such as Inboxes, from different accounts checkbox.
5. Close the General window.

Monday, November 3, 2014

What is a M4B file format?

M4B is a file extension for a MPEG-4 part 14 audio layer audio book container file format used by iTunes. An M4B file is very similar to an M4A file but specified for audio books.

M4B files support metadata for chapters and bookmarking on supporting players and most commonly uses AAC (Advanced Audio Codec).

Programs that can open M4B files include iTunes, Windows Media Player and Roxio Creator.

Tuesday, February 25, 2014

How to export email messages from Windows Live Mail into Outlook?

To export email messages from Windows Live Mail to Outlook, follow these steps:
  1. On the File menu, point to Export, and then click Messages.
  2. In the Windows Mail Export Wizard, click Microsoft Exchange, and then click Next.
  3. Click OK in the following message:

    This will export messages from Windows Mail to Microsoft Outlook or Microsoft Exchange.

    Note:
     If Outlook is not open, select the profile that you want to receive the messages, and then click OK.
     
  4. To specify which files to export, click  All or Selected Folders, and then click OK.
  5. On the File menu, point to Export, and then click Messages.
The folders and contents will appear in the Inbox of the selected profile in Outlook. The date and time of each message are the date and the time that you exported the messages from Windows Mail.

How to View Photos from the Windows 8 Desktop

To view photos and pictures from your Windows 8 desktop, follow these steps:
  1. Right-click the screen’s bottom-left corner and choose Control Panel from the pop-up menu.
  2. When the Control Panel opens, click the Programs category. Click Default Programs and then click Set Your Default Programs.
    The Set Default Programs window appears.
  3. From the left pane, click Windows Photo Viewer. Then select Set This Program As Default and click OK.
    That tells Windows Photo Viewer to open all of your photos, bypassing the Start screen’s Photos app.
After following these steps, a double-click on a digital photo fetches Windows Photo Viewer.

Monday, February 10, 2014

How to Bring an Offline Printer back Online in Windows 7 and 8?

Follow these few steps in Windows 7 or Windows 8:

1. Click Start button and select Devices and Printers.

2. Select the printer that is offline and right click. A menu appears.


3. Select See what's printing.


4. Another window appears. Click on Printer in the upper left corner. And deselect Use Printer Offline. Your printer is back online.


How to fix iTunes 11.1.4 for Windows when crashing after installation?

Some Windows customers may experience installation issues while trying to install or open iTunes 11.1.4 for Windows.

Symptoms include:
-"The program can't start because MSVCR80.dll is missing from your computer"
- "iTunes was not installed correctly. Please reinstall iTunes. Error 7 (Windows Error 126)”
"Runtime Error: R6034 - An application has made an attempt to load the C runtime library incorrectly"
"Entry point not found: videoTracks@QTMovie@@QBE?AV?$Vector@V?$RefPtr@VQTTrack@@@***@@$0A@VCrashOnOverf low@@***@@XZ could not be located in the dynamic link library C:\Program Files(x86)\Common Files\Apple\Apple Application Support\WebKit.dll”

These behaviors can occur if the iTunes installer has insufficient privileges to cleanly update iTunes. To resolve the issue, remove iTunes thoroughly, and then give the iTunes installer administrator privileges.

Follow these steps to resolve the issue:

1. Remove iTunes and related components from the Control Panel
Use the Control Panel to uninstall iTunes and related software components in the following order. 
  1. iTunes
  2. Apple Software Update
  3. Apple Mobile Device Support
  4. Bonjour 
  5. Apple Application Support (iTunes 9 or later)
Then, restart your computer.
Important: Uninstalling these components in a different order, or only uninstalling some of these components, may have unintended affects.

If you encounter an error while uninstalling, try repairing the affected component:
1. In Add/Remove Programs (Windows XP) or Programs and Features (Vista and later), select the component and look for either Change or Repair.
2. Click and follow the wizard to repair the affected component.
3. Remove the affected component after repair.

2. Verify iTunes and related components are completely uninstalled
In most cases, removing iTunes and its related components from the Control Panel will remove all supporting files belonging to those programs. To fully resolve these issues, manually remove any remaining iTunes-related folders listed below.

On 32-bit and 64-bit systems:
  • C:\Program Files\Bonjour
  • C:\Program Files\Common Files\Apple\Mobile Device Support
  • C:\Program Files\Common Files\Apple\Apple Application Support
  • C:\Program Files\Common Files\Apple\CoreFP
  • C:\Program Files\iTunes\
  • C:\Program Files\iPod\

On 64-bit systems:
  • C:\Program Files (x86)\Bonjour
  • C:\Program Files (x86)\Common Files\Apple\Apple Application Support
  • C:\Program Files (x86)\Common Files\Apple\Mobile Device Support
  • C:\Program Files (x86)\Common Files\Apple\CoreFP
  • C:\Program Files (x86)\iTunes\
  • C:\Program Files (x86)\iPod\     
Follow the additional steps at the end of this article if you receive the alert "Cannot delete iPodService.exe: It is being used by another person or program" when trying to delete this folder. Some of the folders above may not be found on all systems.
iPodService.exe Alert:
Follow these steps if the message "Cannot delete iPodService.exe: It is being used by another person or program" appears when you try to delete the iPod folder.
  1. Make sure that iTunes and the iPod Updater utility aren't open.
  2. Press and hold Control-Alt-Delete.
  3. Select Start Task Manager.
  4. Click the Processes tab.
  5. Locate the iPodService.exe in the list.
  6. Click iPodService.exe and choose End Process.
  7. Quit the Task Manager.
3. Reboot your computer.

4. Download the iTunes installer. When prompted to select what you want to do, choose to save it to your computer.

5. Install iTunes.
  • Right click on iTunesSetup or iTunes64Setup.
    • Windows Vista, Windows 7, and Windows 8: Select the 'Run as administrator' option.
    • Windows XP: Select the Open option.
  • Finish installing iTunes.

Saturday, January 25, 2014

How to Resolve "The User Profile Service failed the logon. User profile cannot be loaded"?

It appears while attempting to logon in Windows Vista, 2008, 2008 R2 and 7.
The exact cause is unknown, but this issue may occur if the user profile was manually deleted by using the command prompt or Windows Explorer by a user or by some program. A profile that is manually deleted does not remove the security identifier (SID) from the user profile list in the registry. Since the SID is still present, Windows will still try to load the profile by using the ProfileImagePath that points to a nonexistent path. Therefore, the profile cannot be loaded.
This can also be a issue with the user profile entering into a backup state, or if the C:\Users\(User Name) user profile folder is manually renamed.

1. Log on to the Computer

Log on to the computer using the Administrator (or an Administrator-level) account.
If the computer is not joined to a domain, reboot it and start your computer in safe mode, then log on using the Administrator (or an Administrator-level) account.

2. Trawl through the Registry

Open the Start menu. In the Start Search area, type regedit and press Enter (if prompted by UAC, click Continue/Yes). In regedit, go to:
HKEY_LOCAL_MACHINE\SOFTWARE\Microsoft\Windows NT\CurrentVersion\ProfileList
Expand the ProfileList key and look for the SID key (named "S-1-5"...) with a long number that ends in ".bak". Click it, and look at the ProfileImagePath value in the right pane to verify that this is the user account profile that has the error.
a) If you have two SID keys with the same number (with one ending in ".bak" and one showing the affected user account in the ProfileImagePath value), continue to Step 3;
b) If you have just one SID key with the ProfileImagePath value showing the affected user account, proceed to Step 4.

3. Two SID keys with the same number

a) Of the two SID keys that corresponds to the affected user account, right-click the SID key that does NOT end in ".bak" and click Rename.
b) Add .bk to the end of the numbers and press Enter.
c) Right-click the other SID key that DOES end in ".bak" and click Rename.
d) Remove only .bak from the end of the numbers (so that it has the same name as the other SID key did before you renamed it) and press Enter.
e) Now go back and Rename the first one with .bk to .bak now at the end of the numbers and press Enter.
Proceed to Step 5...

4. Only one SID key ending in ".bak"

a) Right-click the SID key that corresponds to the affected user account and click Rename.
b) Remove only .bak from the end of the numbers, and press Enter.
c) In the right pane, right-click the RefCount value (if none exists, right-click the right pane and click New and DWORD (32 bit) Value, then type RefCount and press Enter), and click Modify.
d) Type 0 into the Value Data textbox and click OK.
e) In the right pane, right-click the State value and click Modify.
f) Type 0 into the Value Data textbox and click OK.

5. Try logging on again!

Close regedit and restart the computer. You should be able to logon now.

How to View Email Headers

To view email headers of an email message, please refer to the appropriate version of your email client:

Outlook 2011 for Mac

  1. Open Outlook.
  2. Ctrl+Click (or right-click with a two-button mouse) on the message from the message list.
  3. Select View Source.
Full headers will appear in a new TextEdit document.

Outlook 2010 (Windows)

  1. Open Outlook.
  2. Open the email message in a new window.
  3. Click on the File tab from the menu bar and choose Properties.
Full headers will appear in the box within the properties window.

Outlook 2007 (Windows)

  1. Open Outlook.
  2. Right-click on the message from the list of messages.
  3. Select Message Options.
Full headers are displayed in the Internet Headers area.

Mac Mail

  1. Open Mac Mail.
  2. Click on the message you'd like to view headers for.
  3. Go to the View menu.
  4. Select Message, then Long Headers.
The full headers will appear in the window below your inbox.

Entourage for Mac

  1. Open Entourage.
  2. Click on the message you'd like to view headers for.
  3. Click on the Message menu and select Internet Headers.

    Mozilla Thunderbird

    1. Open Thunderbird.
    2. Click on the message you'd like to view headers for.
    3. Click the View menu, and select Message Source.
    The full headers will appear in a new window.

    Gmail

    1. Log in to Gmail.
    2. Open the message you'd like to view headers for.
    3. Click the down arrow next to Reply, at the top of the message pane.
    4. Select Show Original.
    The full headers will appear in a new window.

    AOL

    1. Log in to your AOL account.
    2. Open the message you'd like to view headers for.
    3. In the Action menu, select View Message Source.
    The full headers will appear in a new window.

    Hotmail

    1. Log in to your Hotmail account.
    2. Select Inbox from the left-side menu.
    3. Right-click (or Ctrl-click) the message you'd like to view headers for, and select View Message Source.
    The full headers will appear in a new window.

    Yahoo! Mail

    1. Log in to your Yahoo! Mail account.
    2. Select the message you'd like to view headers for.
    3. Click the Actions dropdown and select View Full Headers.
    The full headers will appear in a new window. 

    Thursday, January 16, 2014

    How to recover a note that has been accidentally deleted in Evernote?

    The Evernote application has a Notebook named Trash. Any time that you delete a note, the note is moved to the Trash Notebook.
    To restore a deleted note, follow these steps:
    Step 1: Select and click on Notebooks. in the left column.
    Step 2: Select and double click Trash Notebook.
    Step 3: Select the Note that you want to restore.
    Step 4: Press 'Restore Note' button.
    The Note is automatically moved to your original Notebook.

    Saturday, January 4, 2014

    How to Restore the Desktop Tile in Windows 8

    The Desktop tile in the Metro screen of Windows 8 is suddenly missing. 

    Windows 8 Start Screen shows a rectangle tile of the Desktop which allows you to switch to the desktop from Start Screen. Due to some unknown reasons, sometimes the Desktop tile gets deleted from Windows 8 Start Screen.


    You can follow these simple steps to fix the problem:
    1. Press "Win+R" keys together to open RUN dialog box. Copy the following string in the text box and press Enter:
    %programdata%\Microsoft\Windows\Start Menu\Programs
    This string will open the "Programs" folder containing various shortcuts which are shown at Start Screen or "All Apps" page.
    2. Download the Desktop tile shortcut using following link:
    It is a ZIP file, extract it and you'll find a file "Desktop" in the extracted folder.
    3. Copy "Desktop" file from the extracted folder and paste it in the "Programs" folder which you opened using step 1.
    4. As soon as you copy the shortcut, Desktop tile will be added automatically to Start Screen. If you still don't see the tile, you can re-pin it using "All Apps" page. Now it'll appear on that page.

    Saturday, December 14, 2013

    How to Remove “Nation Zoom” hijack

    Nation Zoom is a browser hijacker, which is promoted via other free downloads, and once installed it will change your browser homepage to nationzoom.com and the default search engine to search.yahoo.com.
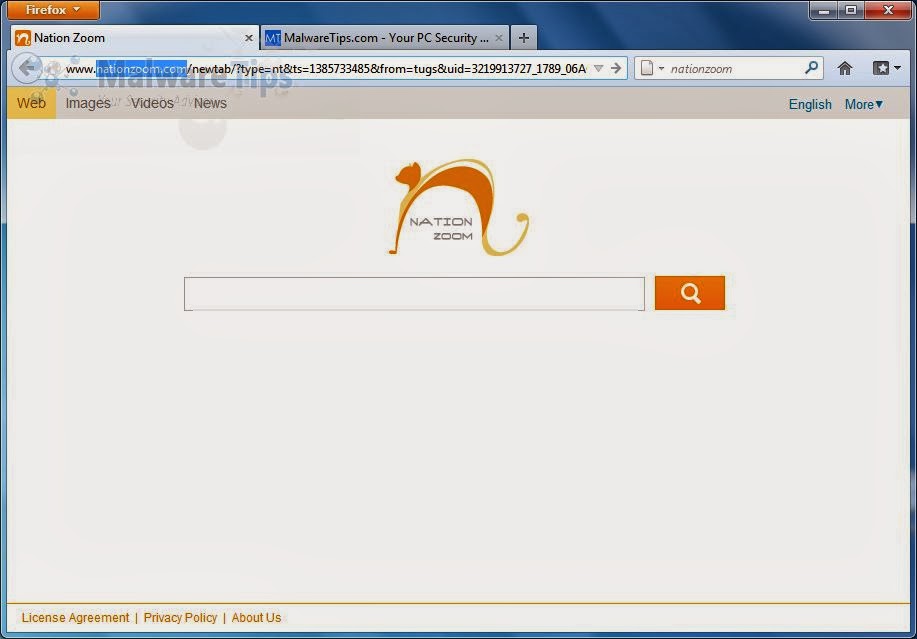
    This in itself is not considered malicious as there are many legitimate programs that change these settings as well. What is considered malicious, though, is that it will also append the argument http://nationzoom.com to random Windows shortcuts on your desktop and your Windows Start Menu. When you launch Firefox, Chrome or Internet Explorer browser, the home page transforms itself into a Nation Zoom homepage, as illustrated below.


    The Nation Zoom homepage will display advertisements and sponsored links in your search results, and may collect search terms from your search queries. The Nation Zoom hijack is used to boost advertising revenue, as in the use of blackhat SEO, to inflate a site’s page ranking in search results.

    Nation Zoom is technically not a virus, but it does exhibit plenty of malicious traits, such as rootkit capabilities to hook deep into the operating system, browser hijacking, and in general just interfering with the user experience. The industry generally refers to it as a “PUP,” or potentially unwanted program.
    Nation Zoom is an ad-supported (users may see additional banner, search, pop-up, pop-under, interstitial and in-text link advertisements) cross web browser plugin for Internet Explorer (BHO) and Firefox/Chrome (plugin) and distributed through various monetization platforms during installation. The browser extension includes various features that will modify the default or custom settings of the browser including the home page, search settings and in some cases will modify Internet Explorer’s load time threshold, place a lock file within Firefox to prevent competing software from changing its settings as well as disable the browser’s Content Security Policy in order to allow for cross site scripting of the plugin.

    Nation Zoom homepage did get on your computer after you installed a freeware software (video recording/streaming, download-managers or PDF creators) bundled with this browser hijacker.
    For example, when you install VPlay, you will also agree to change your browser homepage to nationzoom.com and default search engine to search.yahoo.com.

    However when you uninstall VPlay from your computer, your web browser’s default settings will not be restored. This means that you’ll have to remove Nation Zoom homepage from your favorite web browser manually.

    You should always pay attention when installing software because often, a software installer includes optional installs, such as this Nation Zoom browser hijacker. Be very careful what you agree to install.

    Always opt for the custom installation and deselect anything that is not familiar, especially optional software that you never wanted to download and install in the first place. It goes without saying that you should not install software that you don’t trust.

    Nation Zoom Homepage Removal

    Please follow these steps in the correct order.

    STEP 1: Uninstall Nation Zoom malicious programs from your computer
    STEP 2: Remove Nation Zoom from Internet Explorer, Firefox and Chrome
    STEP 3: Clean up the various Windows shortcuts that have been hijacked by Nation Zoom virus
    STEP 4: Remove Nation Zoom virus with Malwarebytes Anti-Malware Free

    STEP 1 : Uninstall Nation Zoom malicious programs from your computer

    The Nation Zoom browser hijacker is usually installed with other malicious programs, which will either protect this infection from being removed from your computer or will display pop-up ads within the Web browser.
    In this first step, we will try to identify and remove any malicious program that might be installed on your computer.

    To uninstall the programs responsible for the Nation Zoom redirect, click the Start button, then select Control Panel, and click on Uninstall a program.
    If you are using Windows 8, simply drag your mouse pointer to the right edge of the screen, select Search from the list and search for “control panel“. Or you can right-click on a bottom left hot corner (formerly known as the Start button) and select Control Panel from there, then select Uninstall a program.


    When the Add/Remove Programs or the Uninstall a Program screen is displayed, scroll through the list of currently installed programs and uninstall Wsys Control, Extended Protection, eSave Security Control, Desk 365, Nation Zoom browser protection and any other recently installed or unknown programs from your computer.

    If you are having issues while trying to uninstall the Nation Zoom malicious programs, you can use Revo Uninstaller or IObit Uninstaller to completely remove this unwanted program from your machine.

    Depending on what program has installed the Nation Zoom homepage, the above program may have a different name or not be installed on your computer. If you cannot find any unwanted or unknown programs on your machine, then you can proceed with the next step.

    STEP 2 : Remove Nation Zoom from Internet Explorer, Firefox and Chrome

    1. Remove Nation Zoom from Internet Explorer
    Open Internet Explorer, click on the gear icon (Tools for Windows XP users) at the top (far right), then click again on Internet Options.


    In the Internet Options dialog box, click on the Advanced tab, then click on the Reset button.


    In the Reset Internet Explorer settings section, check the Delete personal settings box, then click on Reset.


    When Internet Explorer finishes resetting, click Close in the confirmation dialogue box and then click OK. Close and open Internet Explorer.

    2. Remove Nation Zoom from Mozilla Firefox

    At the top of the Firefox window, click the orange Firefox button, then select Add-ons.


    Select the Extensions tab, then remove Nation Zoom, Extended Protection and any other unknown extensions from Mozilla Firefox.


    Reset your default search engine and homepage from NationZoom.com to their default.
    To reset your search engine and homepage to their default, we will use the SearchReset extension.This add-on is very simple: on installation, it backs up and then resets your search preferences and home page to their default values, and then uninstalls itself. This affects the search bar, URL bar searches, and the home page.
    You can download SearchReset, and then we will just need to install it to revert Firefox to its default settings.


    3. Remove Nation Zoom from Google Chrome

    Click the Chrome menu button on the browser toolbar, select Tools and then click on Extensions.


    In the Extensions tab, remove Extended Protection 1.9, Lightning Newtab and any other unknown extensions by clicking the trash can icon.


    Set Google Chrome default search engine from Yahoo Search to Google.
    Click the Chrome menu button, then select Settings and click on Manage search engines in the Search section.
    In the Search Engines dialog that appears, select Google and click the Make Default button that appears in the row.


    Search for Yahoo Search in the Search Engines list, and click the X button that appears at the end of the row.


    Change Google Chrome homepage from NationZoom.com to its default.
    Nation Zoom has modified your Google settings to open their webpage whenever you start your browser, so we will need to revert this change.
    Click the Chrome menu button, then select Settings and click on One the New Tab page in the On Startup section.


    STEP 3: Clean up the various Windows shortcuts that have been hijacked by Nation Zoom virus

    The Nation Zoom infection will hijack your browser shortcuts, so that each time you will click on the browser icon, you will be automatically be redirected to NationZoom.com. In this third step we will clean your browser shortcuts by removing the http://www.nationzoom.com argument from the Target field.

    Search for your browser shortcut (Desktop, Taskbar or Start Menu Shortcut), then right-click on it and select Properties.


    To view the Properties menu for the browser shortcuts pinned to your taskbar, right-click on the browser shortcut from the Taskbar, then right-click again on the browser icon as see in the below image.


    In the Shortcut tab, in the Target field, remove the http://www.nationzoom.com.


    These are the default shortcut path that should be in your Target box, if the Nation Zoom argument is in there, then you should remove it.

    For Microsoft Internet Explorer: “C:\Program Files\Internet Explorer\iexplore.exe” for Windows 32-bit or “C:\Program Files\Internet Explorer (x86)\iexplore.exe” for Windows 64-bit.
    For Mozilla Firefox: “C:\Program Files\Mozilla Firefox\firefox.exe” for Windows 32-bit or “C:\Program Files (x86)\Mozilla Firefox\firefox.exe” for Windows 64-bit.
    For Google Chrome: “C:\Program Files\Google\Chrome\Application\chrome.exe”

    STEP 4: Remove Nation Zoom virus from your computer with Malwarebytes Anti-Malware

    Malwarebytes Anti-Malware Free utilizes Malwarebytes powerful technology to detect and remove all traces of malware including worms, trojans, rootkits, rogues, dialers, spyware and more.

    Download Malwarebytes Anti-Malware Free, then double click on it to install the program. When the installation begins, keep following the prompts in order to continue with the setup process. Do not make any changes to default settings and when the program has finished installing, click on the Finish button.

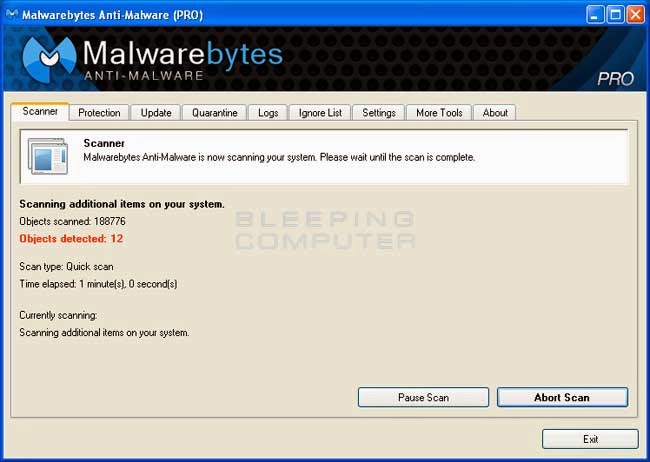
    On the Scanner tab, select Perform full scan and then click on the Scan button to start scanning your computer.


    When the Malwarebytes scan is completed, click on Show Results. You will now be presented with a screen showing you the malware infections that Malwarebytes Anti-Malware has detected. Make sure that everything is checked and click on the Remove Selected button.

    How to remove the FBI Online Agent Ransomware

    The FBI Online Agent ransomware is a computer infection that locks your screen so that you are unable to access your Windows desktop, programs, or documents until you pay a ransom. This ransomware pretends to be a program from the FBI that states that unauthorized cybercrime was being committed from your computer. It then requires you to submit a $200 MoneyPak voucher code in order to unlock the screen. It also threatens that if you do not send the payment within 48 hours your computer will be permanently locked and legal action will be taken against you. Please remember that this is a computer infection and that the FBI is not locking your computer, so please do not be worried about the messages in the lock screen. This infection is detected by a variety of anti-virus vendors using the Trojan-Ransom.Win32.Dapato, Trojan:Win32/LockScreen.CO, Trojan.Agent/Gen-Kryptik identifiers.


    HOW CAN I GET INFECTED WITH FBI VIRUS?
    This infection gets inside the Windows system through security vulnerabilities found when a user visits infected websites or downloads infected files. Of course, you must always think about safe browsing and avoid suspicious downloads that are actively offered on the Internet right now. The biggest issue, which is caused by this ransomware, is that similarly to its earlier versions, it completely blocks its victim's computer, 'locks' it and disables all the programs installed. In order to 'unlock' the system, FBI virus shows its warning and requires that you pay the fine through MoneyPak. Of course, do not proceed with this request, since this is a virus.

    FBI VIRUS VERSIONS:
    FBI Moneypak: This ransomware uses a huge alert filled with FBI and Moneypak logos, a webcam and a list of crimes the victim is accused of. User is informed that he has been viewing/distributing pornographic or copyrighted content, spreading malware or doing other illegal activities. For that, he has to pay a $100  fine and enter a Moneypak code on the right side of the fake alert. This threat locks the system down completely.

    FBI Green Dot Moneypak Virus: This ransomware locks the whole system down and displays a fake alert with FBI, Moneypak and McAfee logos. A misleading message, which belongs to this threat, claims that Federal Bureau of Investigation has blocked you for downloading illegal/copyrighted material and similar crimes. It requires to pay $200 fine and includes the steps explaining how you should do that.

    FBI Virus Black Screen: This ransomware from the FBI group of viruses uses the same technique as its predecessors and seeks to make users pay a $200 fine. However, it also applies an audio warning, black screen and system's lock down. It will similarly claim that you have been caught for law violations and will accuse you for visiting pornographic Web sites, viewing files containing zoophilia, child pornography and similar.

    FBI Online Agent: This ransomware also uses the name of the Federal Bureau of Investigation, but it has a newly-designed alert, which tends to accuse the victim for committing various crimes and asks to pay $200 using MoneyPak. The new thing about FBI Online Agent is that it doesn't show your IP address or location but gives the name of the responsible agent, case number and other details that are clearly invented. Besides, scammers have included the promotion of terrorism into the list of the crimes that are reported into this misleading warning.

    FBI Cybercrime Division virus: That's the dangerous ransomware, which pretends to belong to the FBI's Cybercrime Division. This virus uses an identical scheme while trying to steal users' money. However, this time it asks to pay $300 using Moneypak prepayment system. Rest assured that its alert is not legitimate and can be safely ignored. The new version applies a newly designed alert, which is filled with more than ten different logos.

    FBI PayPal virus: This ransomware is not related in any way to the Federal Bureau of Investigation . As soon as it gets inside the system, this ransomware blocks the entire desktop and disables the Internet connection on its target PC. In addition, it asks to pay the fine of $100 for invented online crimes, such as the use of copyrighted content or distribution of malware. Differently from earlier parasites, this FBI virus uses PayPal for its money transactions. Please, do not answer this threat.

    FBI Department of Defense virus: This is a dangerous ransomware virus, which, similarly to its predecessors, seeks to swindle $300 by convincing its victims that they have violated several USA laws. This virus has the same ability to lock down the PC and hide every file, which is kept on the computer. The new thing about this version of the FBI virus, is that it offers using the MoneyGram prepayment system for paying the fine. Please, never follow its recommendations!

    White Screen FBI virus: This is a cyber infection, which is categorized as ransomware and belongs to the same group of FBI virus. If you see a white screen and a mouse cursor on your computer's desktop, that means this virus failed to load properly. However, you may also receive a huge warning from the FBI, which reports about the illegal use of videos related to child pornography or other e-crimes. Please, ignore the warning that belongs to the White Screen FBI virus and never pay any money or provide any personal information.

    FBI Computer Crime and Intellectual Property Section virus: This is a dangerous ransomware that occupies the entire computer as soon as it infects it. Instead of the desktop, it shows a huge alert stating that the 'computer is locked by Internet Service Provider' for several different reasons. Just like previous versions, it claims that the computer's owner was noticed watching and spreading copyrighted content and doing other activities that clearly violate some laws of the USA. This FBI virus version asks to pay a fine of $200. Please, never follow this requirement.

    FBI System Failure virus: FBI System Failure virus is a serious ransomware threat, which blocks computers with its fake warning saying: 'All Activities of this computer have been recorded. All your files are encrypted. Don’t try to unlock your computer!' Just like its previous versions, this virus seeks to make its victims pay an invented fine. This version is used to swindle $300, and asks to use REloadit prepayment system. If you see such warning, you must ignore it and use anti-malware software to remove malicious files from the system.

    HOW TO REMOVE THE FBI RANSOMWARE

    Automatic FBI virus removal
    Follow these steps:
    1. Print out these instructions as we will need to reboot your computer into Safe mode with Networking and you may not have access to your web browser for part of this process.

    2. As this infection makes it so you are unable to launch any application or access your Windows desktop, we first need to reboot your computer into Safe Mode with Networking. To do this, turn your computer off and then back on and when you see anything on the screen, immediately start tapping the F8 key on your keyboard. Eventually you will be brought to a menu similar to the one below.


    Using the arrow keys on your keyboard, select Safe Mode with Networking and press Enter on your keyboard. Windows will now boot into safe mode with networking and prompt you to login as a user.

    3. Open a browser and download SpyHunter, STOPzilla, Malwarebytes Anti-Malware, Emsisoft Emergency Kit or any other reputable anti-malware program.

    4. Install the anti-malware program on your PC and run a full system scan with the updated anti-virus/anti-malware program. Run several scans if needed.

    Note that users infected with the FBI group of viruses are allowed to access other accounts on their Windows systems. If one of such accounts has administrator rights, you should be able to launch an anti-malware program from that account.

    Manual FBI virus removal:
    1. Reboot you infected PC to 'Safe mode with command prompt' to disable FBI virus (this should be working with all versions of this threat).
    2. Run Regedit.
    3. Search for WinLogon Entries and write down all the files that are not explorer.exe or blank. Replace them with explorer.exe.
    4. Search the registry for these files you have written down and delete the registry keys referencing the files.
    5. Reboot and run a full system scan with an updated anti-malware program to remove remaining files.

    Remove FBI MoneyPak lock screen virus with System Restore
    System Restore helps you restore your computer’s system files to an earlier state or point in time. It’s a way to undo system changes to your computer without affecting your personal files, such as e‑mail, documents, or photos.
    Because the FBI MoneyPak virus will not allow you to start the computer in Windows regular mode, we will need to start System Restore from the Safe Mode with Command Prompt mode.

    Follow these steps:
    1. Reboot your computer into Safe Mode with Command Prompt. To do this, turn your computer off and then back on and immediately when you see anything on the screen, start tapping the F8 key on your keyboard.

    If you are using Windows 8, the trick is to hold the Shift button and gently tap the F8 key repeatedly, this will sometimes boot you into the new advanced “recovery mode”, where you can choose to see advanced repair options. On the next screen, you will need to click on the Troubleshoot option, then select Advanced Options and select Windows Startup Settings. Click on the Restart button, and you should now be able to see the Advanced Boot Options screen.

    2. Using the arrow keys on your keyboard, select Safe Mode with Command Prompt and press Enter on your keyboard.

    3. At the command prompt, type rstrui.exe, and then press Enter.


    Alternatively, if you are using Windows Vista, 7 and 8, you can type: C:\windows\system32\rstrui.exe , and press Enter. And if you are a Windows XP user, type C:\windows\system32\restore\rstrui.exe, then press Enter.

    4. System Restore should start, and you will display also a list of restore points. Try using a restore point created just before the date and time the FBI MoneyPak lock screen virus has infected your computer.


    5. When System Restore has completed its task, start your computer in Windows regular mode, and perform a scan with an anti-malware program.

    Wednesday, December 11, 2013

    How to hide the video information box in CyberLink PowerDVD?

    In CyberLink PowerDVD, a video information box can suddenly appear in the upper right corner of the screen and permanently sit on every video screen. It can be a nuisance when it hides a portion of the image.

    How do you remove it?

    1. Right click anywhere outside of that information box.
    2. A long rectangular menu appears.
    3. Down the list, there is an item called 'Show Information' that is checked.
    4. Unselect and the check mark will disappear as well as the information box in the upper right hand corner.
    5. Click anywhere outside this menu to hide it.

    Wednesday, December 4, 2013

    How to Remove Antivirus Security Pro?

    What is Antivirus Security Pro and what can Antivirus Security Pro do?

    Antivirus Security Pro is categorized as rogueware program that claims to scan your computer for Virus, Trojan, spyware and malware and display obvious fake malware detections and warnings. They then pop-up a new window informing you that you need to pay money to register the software or pay money to remove these non-existent threats from your computer and protect your PC from malware infection.

    Below is a screenshot of Antivirus Security Pro, a certain symptom of virus infection:


    Antivirus Security Pro is mainly distributed through hacked web sites that exploit vulnerabilities on your computer or as Trojans disguised as a normal program that is necessary for you to view an online video or as online scanner that deceives you to download and this copy of rogueware virus is designed to attack Windows-based operating systems. Once your computer is infected with Antivirus Security Pro, you will get a fake Windows Security Center notification pop up on your computer screen claiming that your antivirus software is turned off.

    When you click to turn on your Firewall and Virus protection, you will get a pop-up window that requires you to register the full version of the rogueware Antivirus Security Pro Virus.
    After that, Antivirus Security Pro begins to perform a scan automatically on your computer and then a list appears displaying a message providing details about a virus or a Trojan detected.


    If you click on the remove button, it will tell you that some of the detection can not be removed and you need to purchase the full version of the rogueware in order to completely clear the non-existent threats detected by Antivirus Security Pro.


    Meanwhile Antivirus Security Pro is capable of blocking some programs from launching itself while claiming that they are infected, usually the .exe files, for example, you cannot launch your Task Manager or Chrome.


    Antivirus Security Pro is a virus infection and the alert message is a scam. You should never trust the rogueware program and pay to buy the full version. If you get Antivirus Security Pro on your PC, just follow one of the free methods provided below to remove that fake program.

    METHOD 1: Removing Antivirus Security Pro Virus infection with anti-malware program

    Step 1: Reboot your computer into Safe Mode with Networking. To do this, turn your computer off and then back on and immediately when you see anything on the screen, start tapping the F8 key on your keyboard. Eventually you will be brought to a menu similar to the one below:


    Using the arrow keys on your keyboard, select Safe Mode with Networking and press Enter on your keyboard. Windows will now boot into safe mode with networking and prompt you to login as a user. Please login as the same user you logged in within the normal Windows mode.

    Step 2: It is possible that the infection you are trying to remove will not allow you to download files on the infected computer. If this is the case, then you will need to download the files requested in this guide on another computer and then transfer them to the infected computer. You can transfer the files via a CD/DVD, external drive, or USB flash drive.

    Before we can do anything we must first end the processes that belong to Antivirus Security Pro so that it does not interfere with the cleaning procedure. To do this, please download RKill. When at the download page, click on the Download Now button labeled iExplore.exe. When you are prompted where to save it, please save it on your desktop.

    Step 3: Once it is downloaded, double-click on the iExplore.exe icon in order to automatically attempt to stop any processes associated with Antivirus Security Pro and other Rogue programs. Please be patient while the program looks for various malware programs and ends them. When it has finished, the black window will automatically close and you can continue with the next step. If you get a message that RKill is an infection, do not be concerned. This message is just a fake warning given by Antivirus Security Pro when it terminates programs that may potentially remove it. If you run into these infections warnings that close RKill, a trick is to leave the warning on the screen and then run RKill again. By not closing the warning, this typically will allow you to bypass the malware trying to protect itself so that RKill can terminate Antivirus Security Pro . So, please try running RKill until the malware is no longer running. You will then be able to proceed with the rest of the guide. Do not reboot your computer after running RKill as the malware programs will start again.

    If you continue having problems running RKill, you can download the other renamed versions of RKill from the RKill download page. Both of these files are renamed copies of RKill, which you can try instead. Please note that the download page will open in a new browser window or tab.

    Step 4: Now you should download Malwarebytes Anti-Malware, or MBAM and save it to your desktop. Once downloaded, close all programs and windows on your computer. Double-click on the icon on your desktop named mbam-setup.exe. This will start the installation of MBAM onto your computer. When the installation begins, keep following the prompts in order to continue with the installation process. Do not make any changes to default settings and when the program has finished installing, make sure you leave both the Update Malwarebytes Anti-Malware and Launch Malwarebytes Anti-Malware checked. Then click on the Finish button. If MalwareBytes prompts you to reboot, please do not do so.

    Step 5: MBAM will now automatically start and you will see a message stating that you should update the program before performing a scan. As MBAM will automatically update itself after the install, you can press the OK button to close that box and you will now be at the main program as shown below. On the Scanner tab, make sure the the Perform full scan option is selected and then click on the Scan button to start scanning your computer for Antivirus Security Pro related files. MBAM will now start scanning your computer for malware. This process can take several minutes.


    When MBAM is scanning it will look like the image below.


    When the scan is finished a message box will appear as shown in the image below. You should click on the OK button to close the message box and continue with the Antivirus Security Pro removal process.


    Step 6: You will now be back at the main Scanner screen. At this point you should click on the Show Results button. A screen displaying all the malware that the program found will be shown as seen in the image below. Please note that the infections found may be different than what is shown in the image.


    You should now click on the Remove Selected button to remove all the listed malware. MBAM will now delete all of the files and registry keys and add them to the programs quarantine. When removing the files, MBAM may require a reboot in order to remove some of them. If it displays a message stating that it needs to reboot, please allow it to do so. Once your computer has rebooted, and you are logged in, please continue with the rest of the steps. When MBAM has finished removing the malware, it will open the scan log and display it in Notepad. Review the log as desired, and then close the Notepad window. You can now exit the MBAM program.

    Your computer should now be free of the Antivirus Security Pro program. If your current anti-virus solution let this infection through, you may want to consider purchasing the PRO version of Malwarebytes Anti-Malware to protect against these types of threats in the future.

    METHOD 2: Removing Antivirus Security Pro manually

    Step 1: Use the debugged keys to register this infection and stop the Antivirus Security Pro malicious activities. Open Antivirus Security Pro. Click the “Buy Full Edition” button and then choose “I already have a activation key” option.


    Enter the Antivirus Security Pro activation key AF03E-A1B69411-5E496BEE-92A70D00-1AD697F6 and click “OK” to activate the rogue antivirus program.


    After you activate Antivirus Security Pro rogueware, you are able to access the Internet, use an antivirus program, open your Task Manager and access regedit.

    Step 2: Exit Antivirus Security Pro from your task menu. 


    Confirm your operation when a pop-up message appears like below:


    Step 3: Delete all Antivirus Security Pro related malicious files. Find the shortcut icon on your startup menu or desktop, right click on it, and then select Properties from the list.


    Click on “Open File Location” and then you will be prompted to Antivirus Security Pro file folder.


    Delete all the file located under the file location.


    Step 4: Uninstall Antivirus Security Pro from your infected computer.
    • Windows XP: Go to Start > Control Panel > Add Remove programs > Look for Antivirus Security Pro > Click on Remove.
    • Windows 7/Vista: Go to Start > Control panel > Uninstall a program/Programs and Features > Look for Antivirus Security Pro > click on Uninstall.


    Step 5: Remove malicious registry entries created by Antivirus Security Pro. Click on the “Start” button and in the “Search programs and files” field, type “regedit” and click the “Enter” button.


    In Windows Regedit, go to Edit > Find, in the search box type Antivirus Security Pro and gpngn373, then click on the Find Next.


    It will show you all the Antivirus Security Pro registry and files, right click on those items and delete all of them.

    Step 6: Run an antivirus or anti-malware scan to eliminate any possible virus infection with your favorite security application.